django RestFramework + Vue.js Authentication (1/6)
django RestFramework api로 백엔드 만들고, Vue로 프론트엔드 만들어 회원가입, 로그인, 로그아웃 기능 구현하기
프로그래밍Jan. 3, 2024, 8:19 p.m.
Django의 RestFramework를 사용하면 쉽게 API를 만들 수 있고, 이를 통해 모바일 앱이나 React 혹은 Vue를 이용한 다이나믹한 웹사이트를 만들 수 있다.
앞으로 몇 개의 포스트는 이와 관련된 내용을 담을 예정이다.
이번 포스트에서는 장고로 프로젝트 세팅하는 과정에 대해 기술하려 한다.
패키지 설치
pip install django
pip install django-allauth==0.51.0
pip install dj-rest-auth==4.0.1
pip install djangorestframework
pip install djangorestframework-simplejwt
2023년 12월 기준으로 django-allauth와 dj-rest-auth의 최신 버전을 사용하면, jwt 인증이 안되는 문제가 있어서 과거 버전으로 해야 한다.
- 참고자료
- [DRF] 구글 소셜 로그인 TypeError: string indices must be integers 에러
- [DRF] 소셜 로그인 TypeError: string indices must be integers 에러
backend 프로젝트 만들기
> mkdir backend_django
> cd backend_django
> django-admin startproject django_prj .
계정 정보를 관리할 앱 accounts 생성
> python manage.py startapp accounts
settings.py의 INSTALLED_APPS에 패키지와 새로 만든 앱 추가
# settings.py
INSTALLED_APPS = [
    'django.contrib.admin',
    'django.contrib.auth',
    'django.contrib.contenttypes',
    'django.contrib.sessions',
    'django.contrib.messages',
    'django.contrib.staticfiles',

    'django.contrib.sites',

    # django-rest-framework
    'rest_framework',
    'rest_framework.authtoken',
    'rest_framework_simplejwt',
    'rest_framework_simplejwt.token_blacklist',

    # dj-rest-auth
    'dj_rest_auth',
    'dj_rest_auth.registration',

    # allauth
    'allauth',
    'allauth.account',
    'allauth.socialaccount',
    'allauth.socialaccount.providers.google',

    'accounts'
]
settings.py에 django-allauth 관련 내용 추가
# settings.py
SITE_ID = 1
REST_FRAMEWORK = {
    'DEFAULT_AUTHENTICATION_CLASSES': (
        'rest_framework.authentication.SessionAuthentication',
        'dj_rest_auth.jwt_auth.JWTCookieAuthentication',
    ),
}

ACCOUNT_EMAIL_REQUIRED = True            # email 필드 사용 여부
ACCOUNT_AUTHENTICATION_METHOD = 'email'
JWT 환경 설정
# settings.py
REST_USE_JWT = True
from datetime import timedelta
SIMPLE_JWT = {
    'ACCESS_TOKEN_LIFETIME': timedelta(hours=2),
    'REFRESH_TOKEN_LIFETIME': timedelta(days=7),
    'ROTATE_REFRESH_TOKENS': False,
    'BLACKLIST_AFTER_ROTATION': True,
}
migration
> python manage.py migrate
urls 설정
# prj/urls.py
from django.contrib import admin
from django.urls import path, include
urlpatterns = [
    path('admin/', admin.site.urls),

    path('accounts/api/', include('dj_rest_auth.urls')),
    path('accounts/', include('allauth.urls')),
    path('accounts/', include('accounts.urls')),
]
accounts의 urls.py를 include 했으므로 accounts/urls.py를 아래와 같이 임시로 만든다.
# accounts/urls.py
urlpatterns = [
    # not implemented yet
]
확인
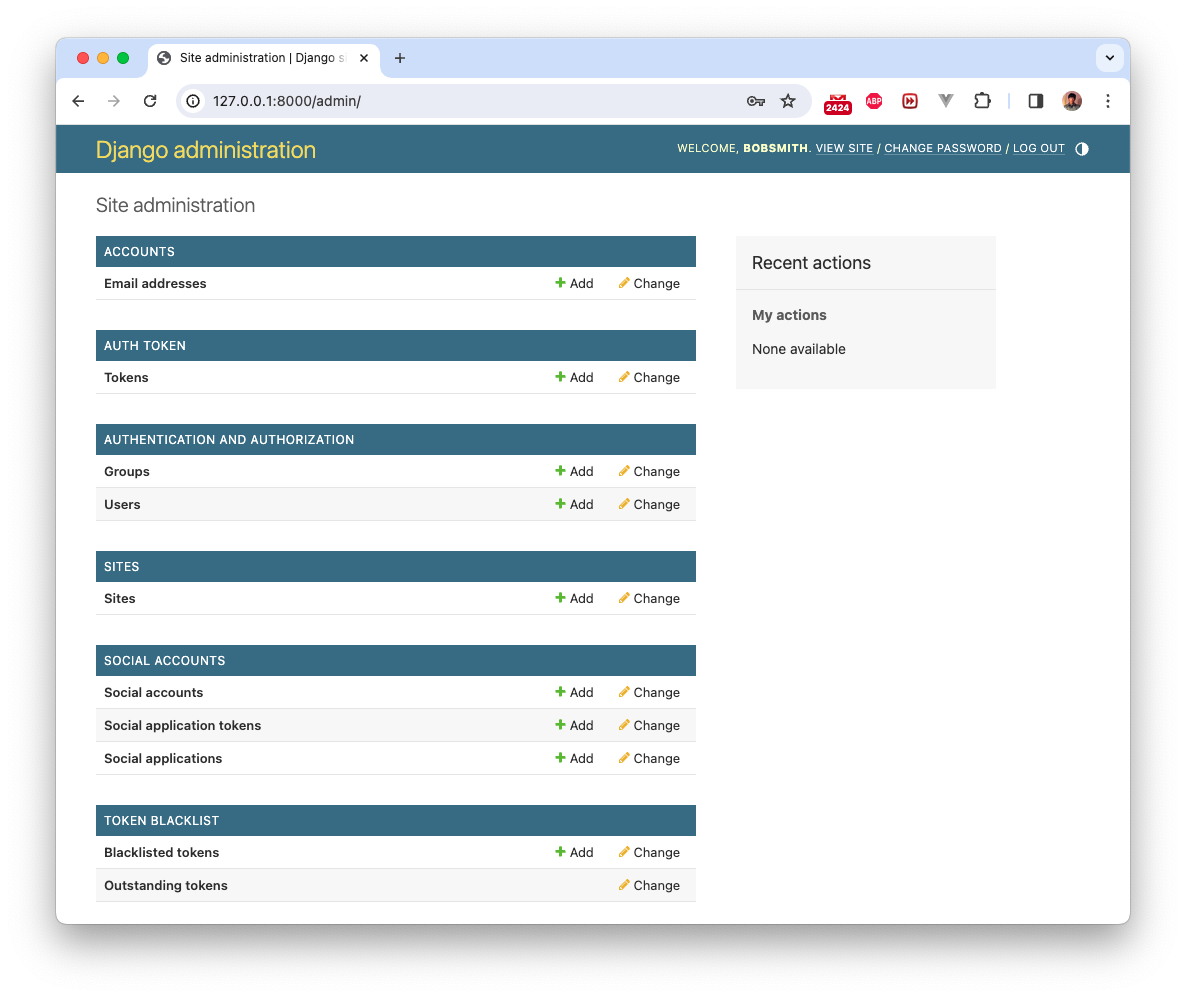
admin 페이지
이제 터미널에서 python mnaage.py migrate를 한다. 그리고 python manage.py createsuperuser로 super user를 만든다. admin 페이지에 로그인 했을 때 아래와 같이 되어 있으면 성공
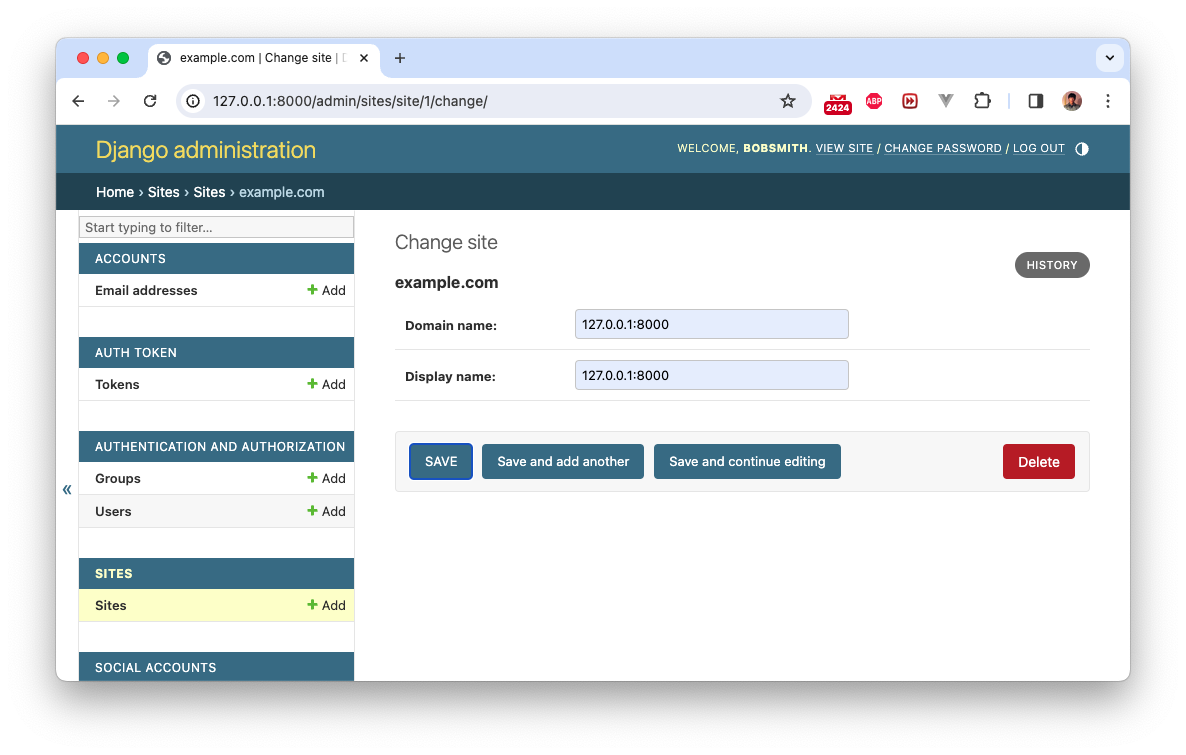
site에 example.com으로 되어 있는 것을 127.0.0.1:8000으로 수정한다.
api
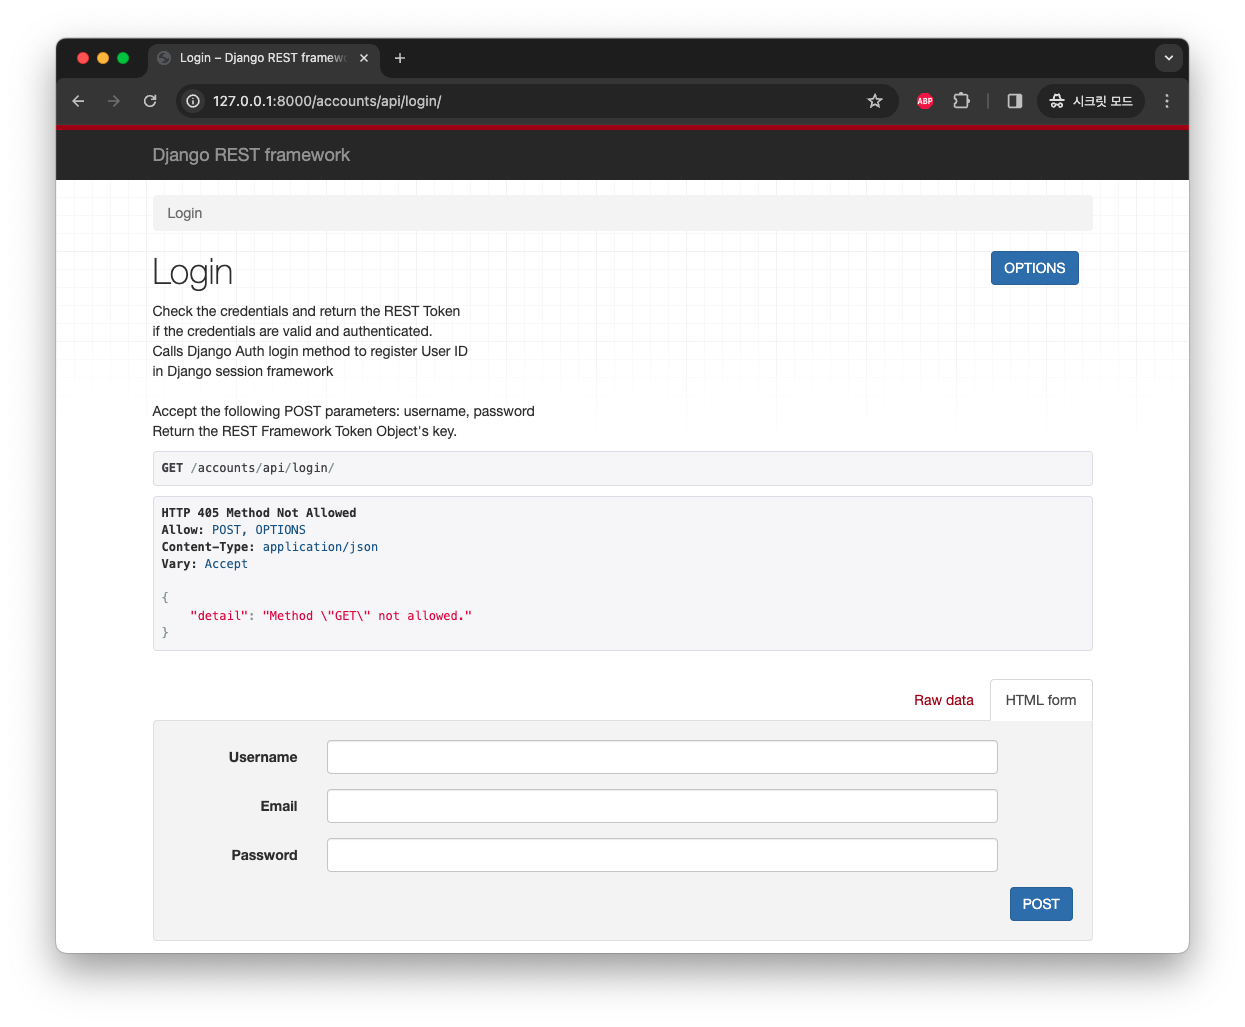
api로 가입하는 경로가 없다.
admin/
accounts/api/ password/reset/ [name='rest_password_reset']
accounts/api/ password/reset/confirm/ [name='rest_password_reset_confirm']
accounts/api/ login/ [name='rest_login']
accounts/api/ logout/ [name='rest_logout']
accounts/api/ user/ [name='rest_user_details']
accounts/api/ password/change/ [name='rest_password_change']
accounts/ signup/ [name='account_signup']
accounts/ login/ [name='account_login']
accounts/ logout/ [name='account_logout']
accounts/ password/change/ [name='account_change_password']
accounts/ password/set/ [name='account_set_password']
accounts/ inactive/ [name='account_inactive']
accounts/ email/ [name='account_email']
accounts/ confirm-email/ [name='account_email_verification_sent']
accounts/ ^confirm-email/(?P<key>[-:\w]+)/$ [name='account_confirm_email']
accounts/ password/reset/ [name='account_reset_password']
accounts/ password/reset/done/ [name='account_reset_password_done']
accounts/ ^password/reset/key/(?P<uidb36>[0-9A-Za-z]+)-(?P<key>.+)/$ [name='account_reset_password_from_key']
accounts/ password/reset/key/done/ [name='account_reset_password_from_key_done']
accounts/ social/
accounts/ google/
API로 회원 등록, 로그인 하는 기능은 다음 포스트에서...
Leave a Comment: